In the previous section, we explained what Aurora is, why it is important, and why we use it.
In this article we will provide you with the knowledge on how you can update, install, or remove apps via Aurora.
1.0 Aurora: Paid Apps
Aurora is very similar to the Play Store or Apple Store. You can use it to download any app found on the traditional app stores, with the added benefit of bypassing regional filters, meaning that you can access all the apps available for any region – something which the Apple Store or Play Store can’t offer.
As we noted, Aurora can be used anonymously. Meaning that you do not need a Google account to access the app library.
If you do have apps that you have paid for using your Google account via the Play Store, then you will need to log in using that specific Google account to restore access.
To access your Google account via Aurora then follow the steps listed below:
- Locate Aurora within the ‘Get Apps’ folder on the home screen or via the main app menu.
- Once Aurora opens it will connect and display the main screen within the app.
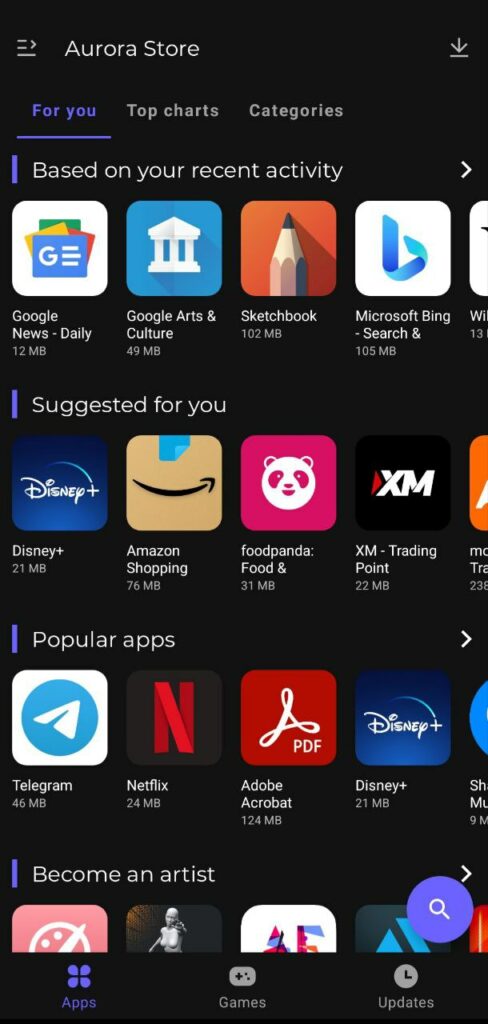
- Tap the top left icon to slide open the main menu.

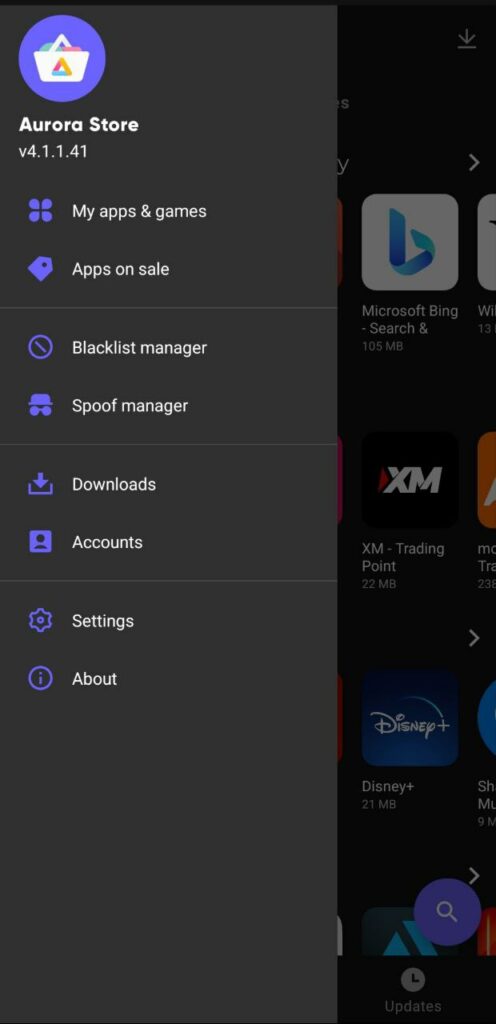
- You will see a list of options. Tap on ‘Accounts‘.
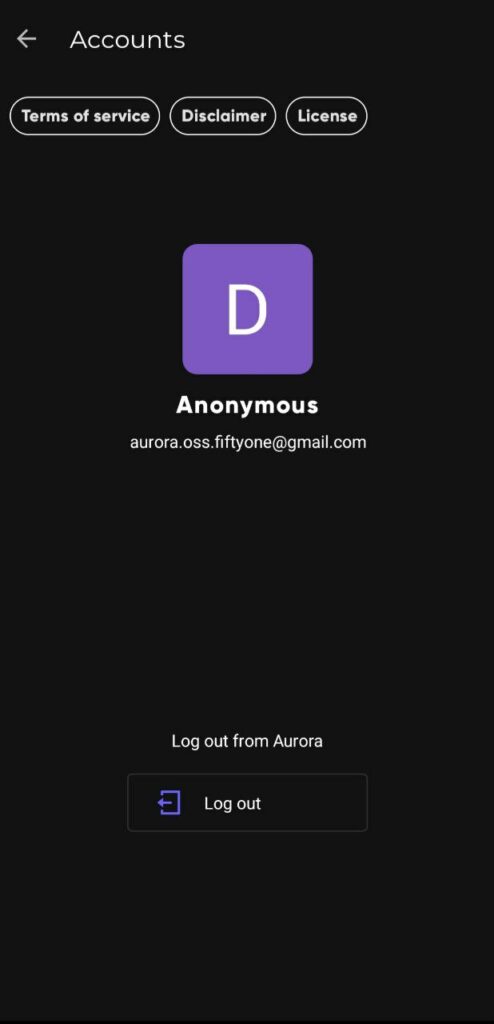
- Tap on ‘Log out‘ to exit the anonymous mode.
- You can then tap on ‘Google’ to log in using your existing account from which the app was paid for.
Note: if you are coming from an iPhone and have paid for apps unfortunately there is no way to transfer them to the Privacy Phone or any other phone apart from those made by Apple. You can learn more about this via: Will my paid Apple Store apps work on the Privacy Phone?
2.0 Aurora: Install Apps
Follow the steps listed below to install apps via Aurora:
- Locate Aurora within the ‘Get Apps’ folder on the home screen or via the main app menu.
- Once Aurora opens it will connect and display the main screen within the app.
If you are having connection issues and Aurora is not able to connect (and you are sure you are connected to the internet), then Aurora may need to be updated. You can update Aurora via F-Droid. Please use the steps listed in: 5.1: App Manager: F-Droid.

- Once you reach the main screen in Aurora, you will see a search icon on the bottom right.
- Tap the search icon and type the name of the app you are searching for.
- Once you have located the app you want to install, tap on it.
- You will then see an ‘INSTALL‘ button on the bottom of the screen.
- Tap on ‘INSTALL to download the app.
- You will get a notification asking whether you want to install the app.
- Tap on ‘INSTALL’ again to begin the installation.
- Wait until you see the ‘INSTALL’ button changes to ‘OPEN“, indicating that the setup is complete.
- You can now open the app or add it to your home screen.
NOTE: only apps added via F-Droid are automatically added to the home screen. Apps added via Aurora will need to be manually added to the home screen if want them to be there. To learn how to add apps to the home screen see the guide below:
3.0 Aurora: Update Apps
Follow the steps listed below to update apps such as Signal or Brave:
- Locate Aurora within the ‘Get Apps’ folder on the home screen or via the main app menu.
- Once Aurora opens it will connect and display the main screen within the app.
- On the bottom, you will see several options. Tap on ‘Updates‘.
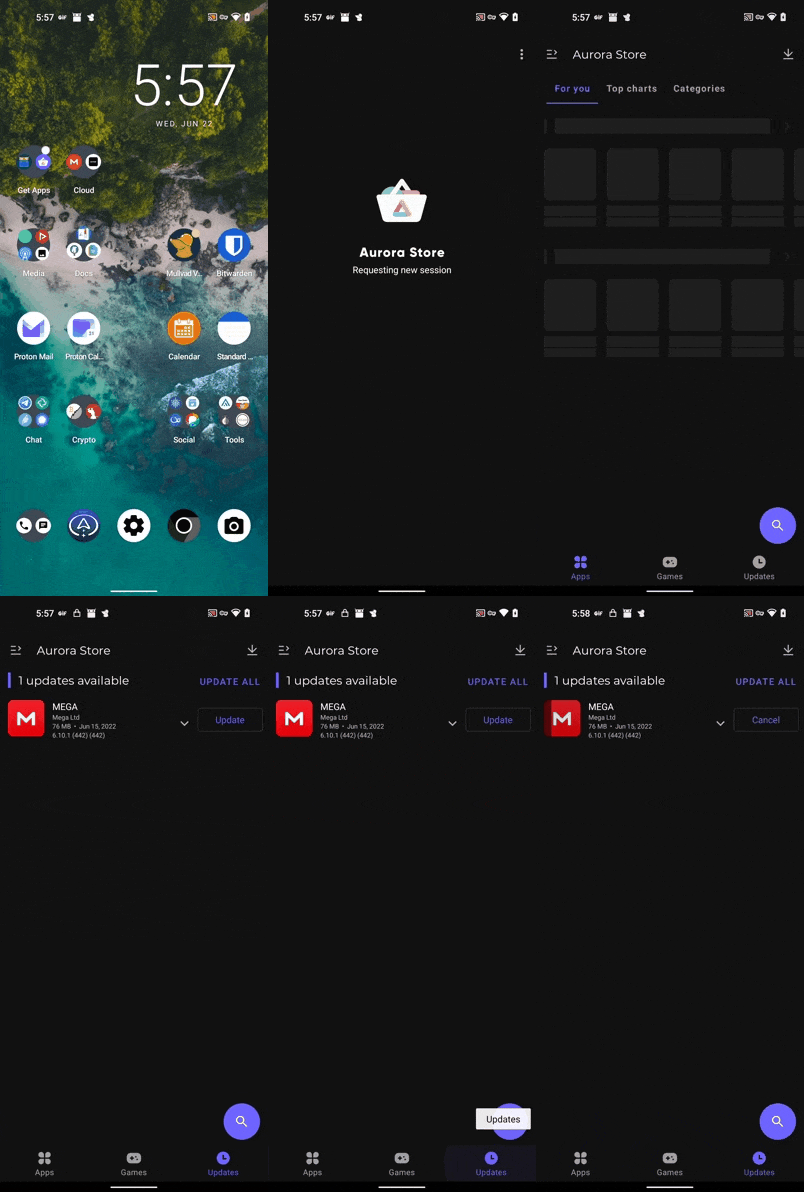
- You will now see a list of apps that can be updated.
- It is always best to refresh the list by pulling down on the screen, similar to social media updates, so that you get the latest available updates for your installed Aurora apps.
- You can now update the apps one by one or all at once by tapping on ‘UPDATE ALL’.
- The update process may take a few minutes depending on how many apps require an update.
- You will see the button next to each app change from ‘Update’ to ‘Install’ once the update is downloaded. (on some phones the update button will automatically install the update and the app will be removed from the list as the update is complete).
- Press on the ‘Install‘ button next to each app.
- If you see a notification asking for your permission to perform the update for each app, tap on ‘UPDATE’ to confirm.
3.0 Aurora: Remove Apps
If you purchased the Privacy Phone with the Privacy Plus package then you would have received the phone pre-installed with various privacy-respecting apps. If you wish to remove any of them then follow the steps listed below:
- Locate Aurora within the ‘Get Apps’ folder on the home screen or via the main app menu.
- Once Aurora opens it will connect and display the main screen within the app.
- Tap the top left icon to slide open the main menu.

- You will see a list of options. Tap on ‘My apps & games‘.
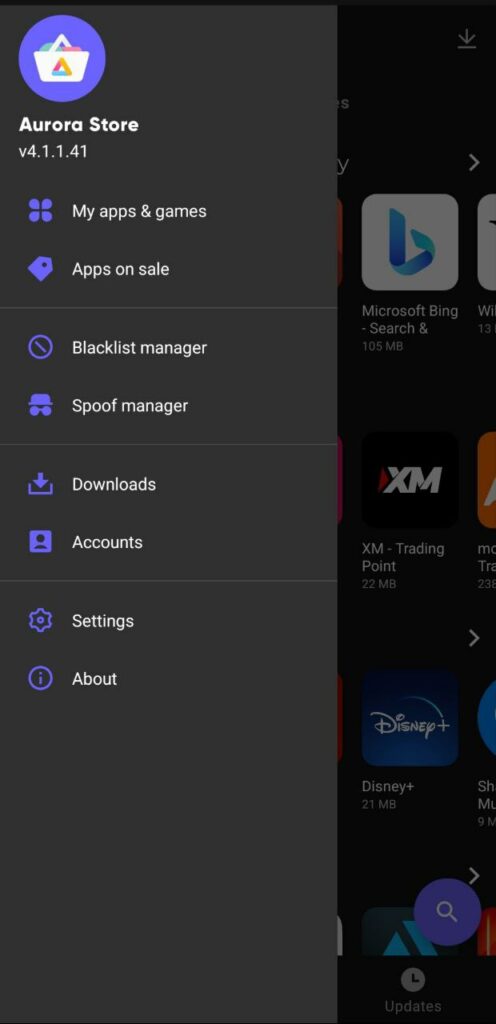
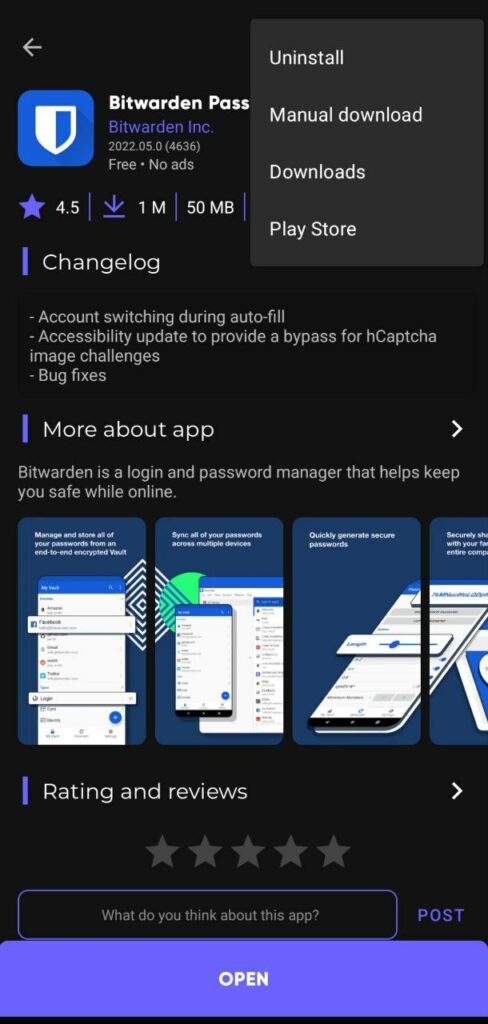
- Tap on the app that you want to remove.
- Tap on the three dots button located on the top right.
- Tap on ‘Uninstall‘ from the list of options to remove the app.
4.0 Aurora: Can’t Find My App
One of the great advantages of Aurora is that it gives you access to the entire app library.
For example, if your Apple Store or Play Store region is set to Australia and you move to Mexico, you won’t be able to download certain apps, such as Mi Telcel, unless you change your Play Store region (limited to 1 change per year).
Aurora bypasses this limitation by allowing you to search for the Play Store link via the phone’s browser, and then open that link in Aurora so that you can download the desired app.
If you can’t find your app within Aurora, and you know it exists on the traditional Play Store, then follow the steps below to find and install your app:
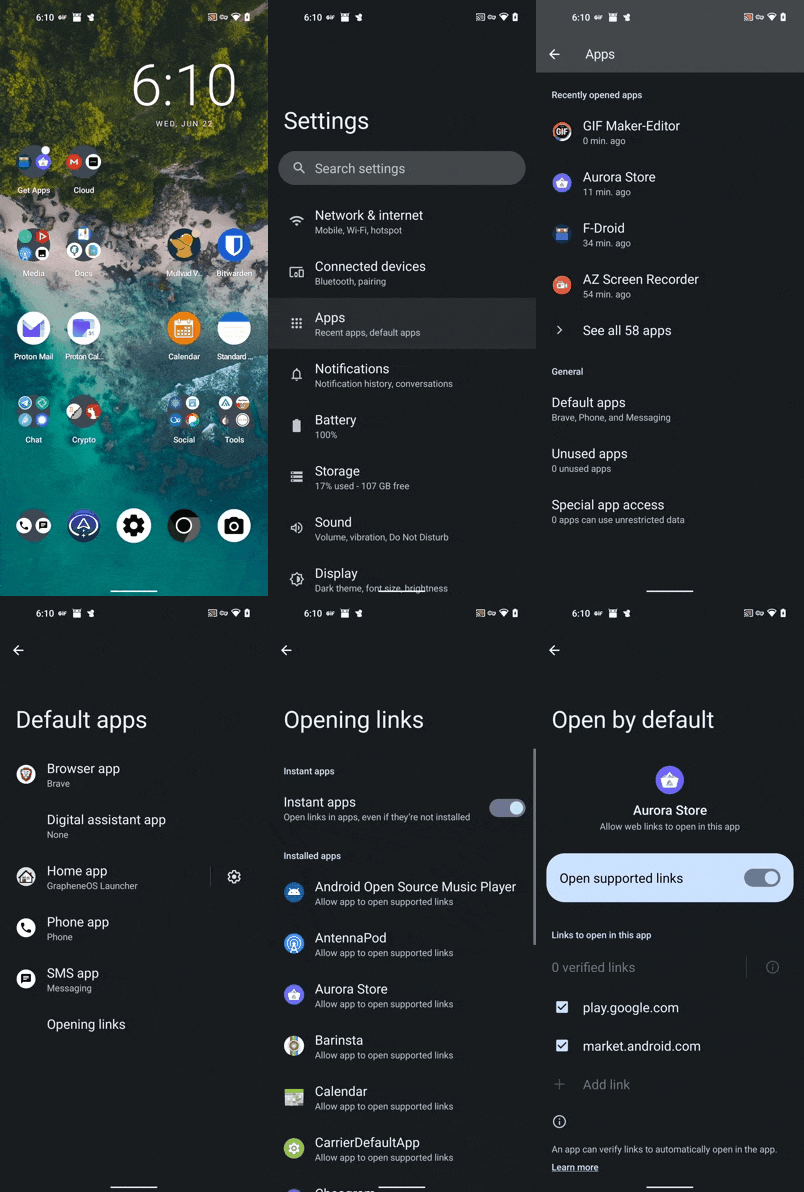
- Go to Settings
 Apps
Apps  Default Apps
 Opening links.
 - Locate Aurora.
- Make sure play.google.com and market.android.com are both ticked.
- If they are not listed, then tap on + Add Link and add them both.
- Return to your home screen.
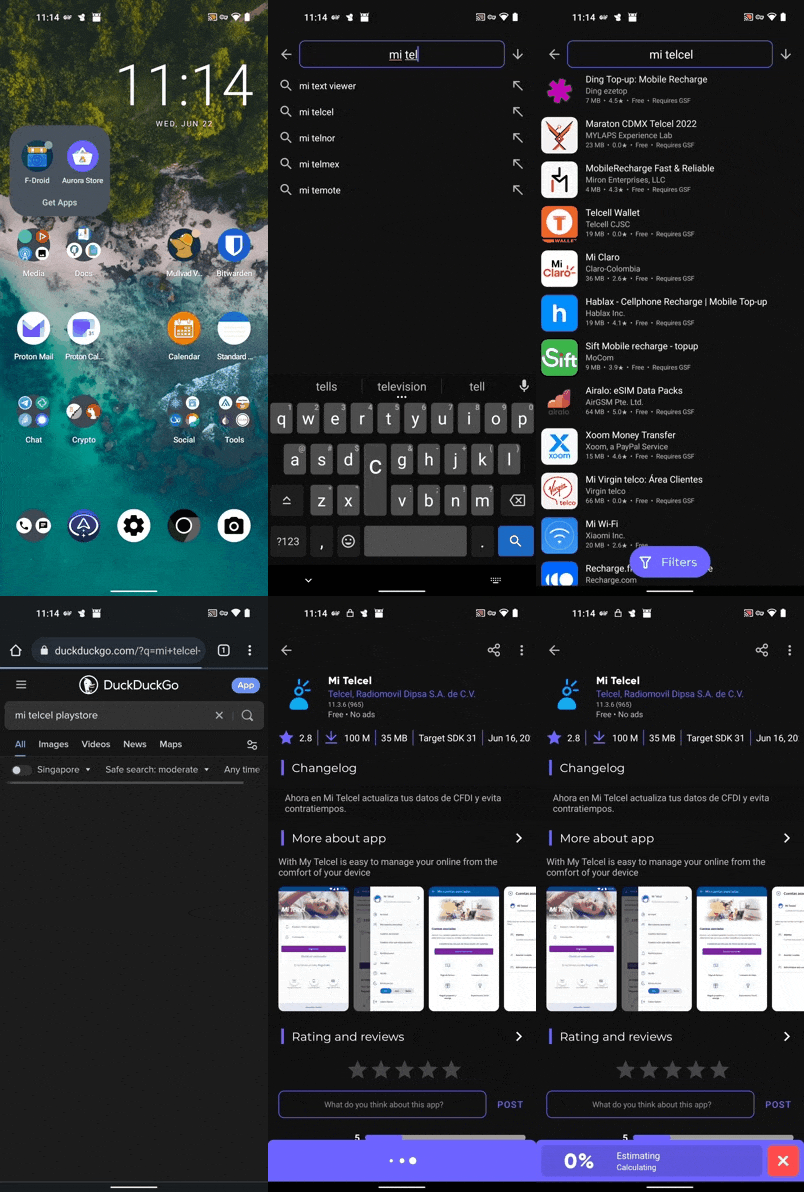
- Open your web browser (Brave or Vanadium).
- Search for the app that you want and put Play Store at the end of it.
For example: Brave Browser Play Store - Locate the Google play store link and tap on it.
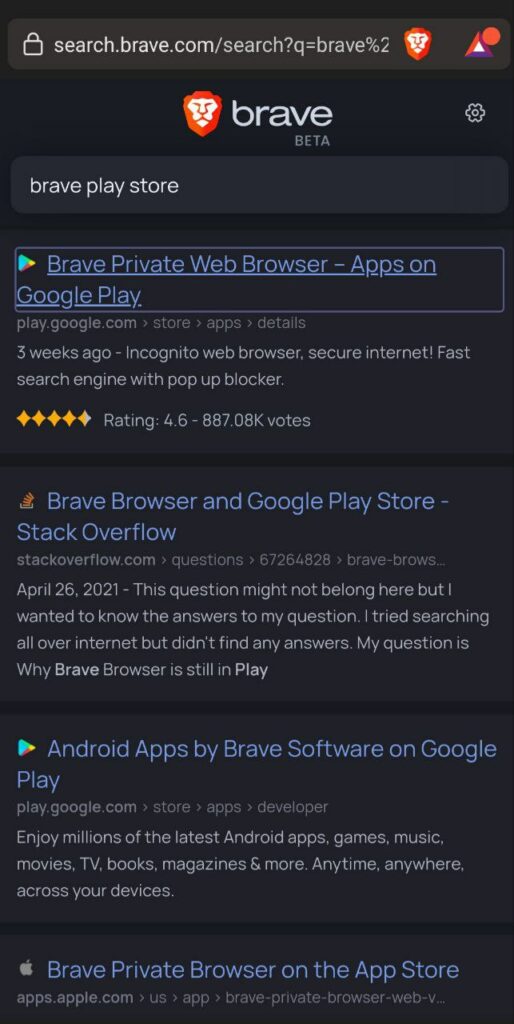
- The link will open in Aurora and display the app page.
- Tap on ‘Install‘ to add the app to your Privacy Phone.